How To Draw A Shirt
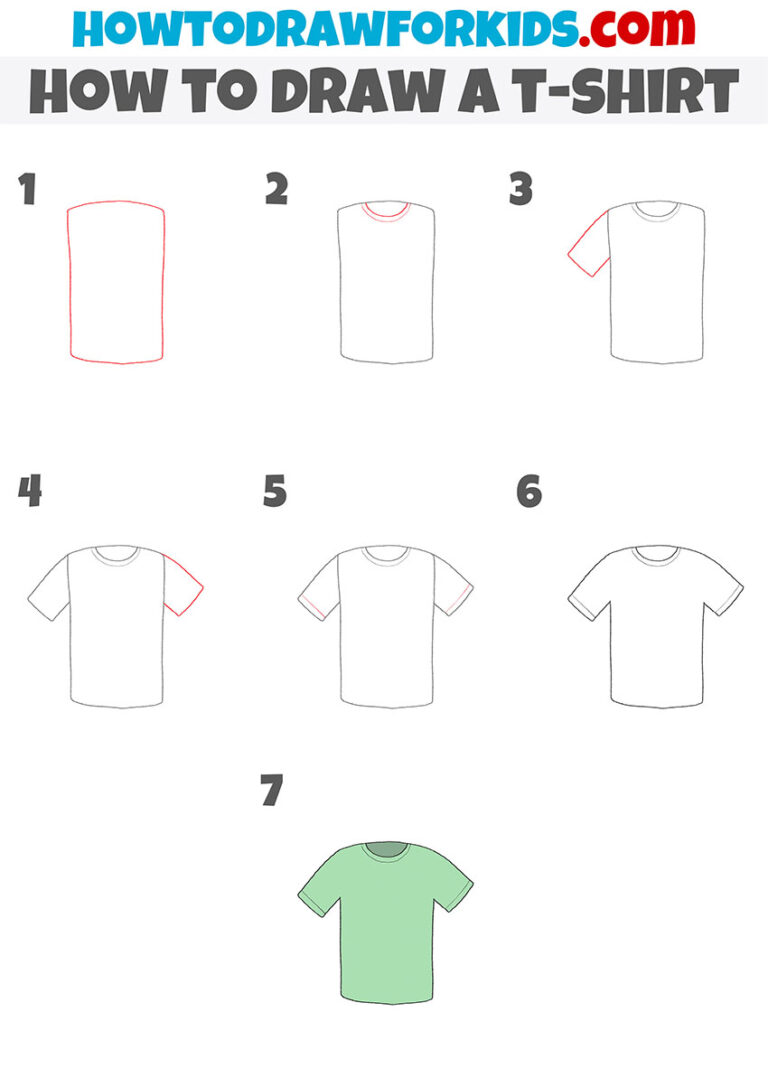
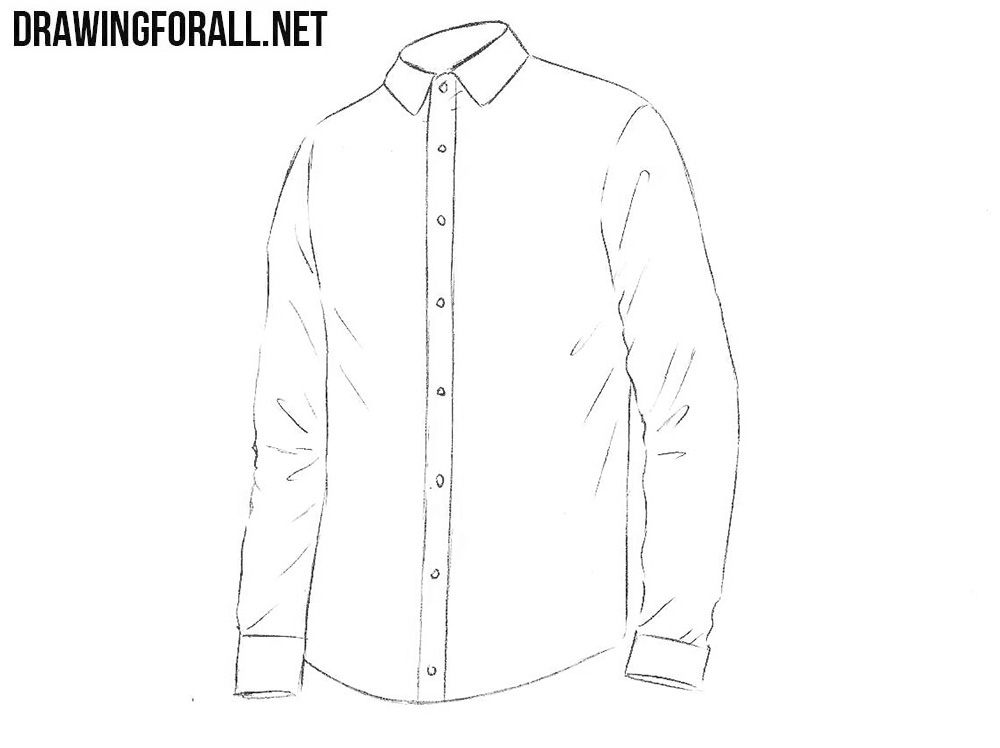
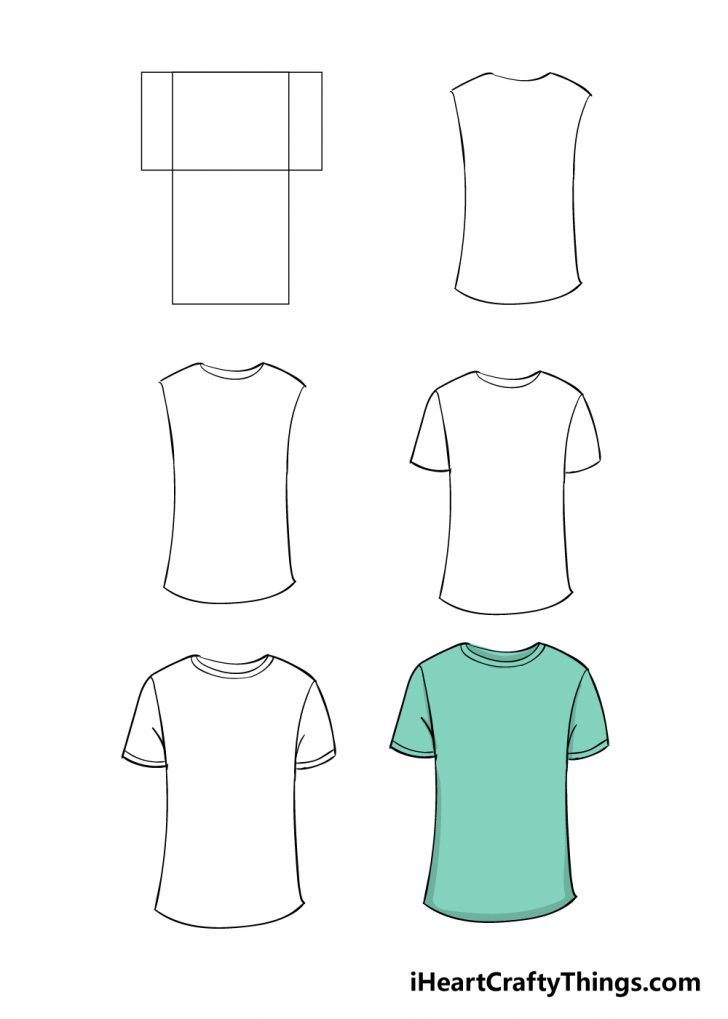
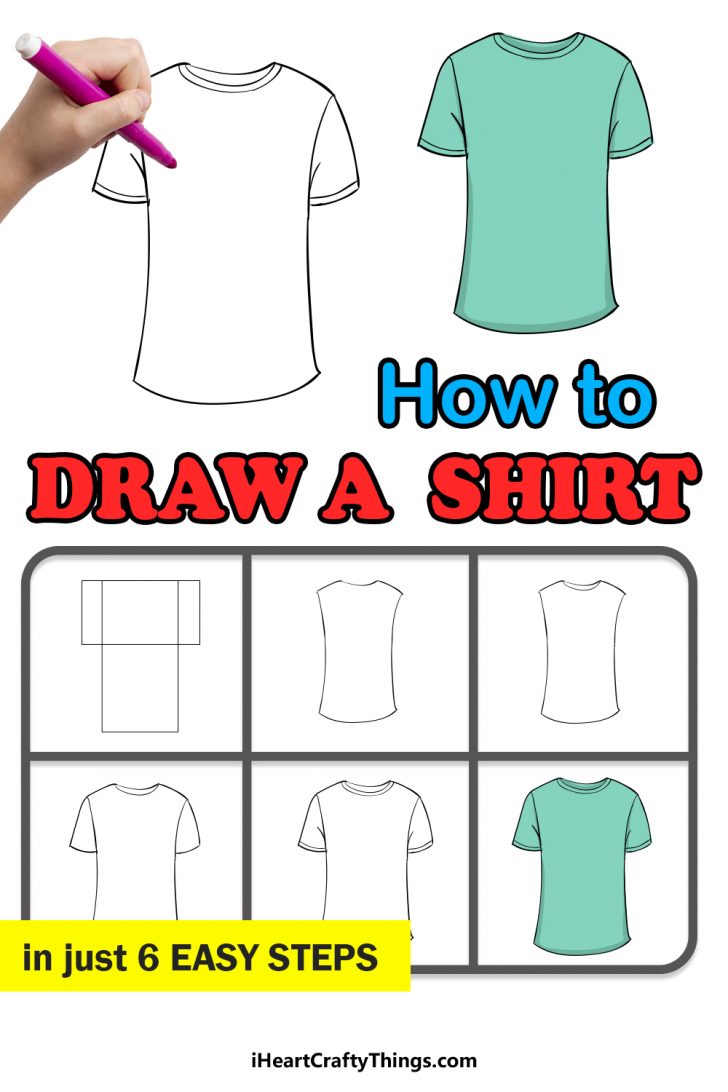
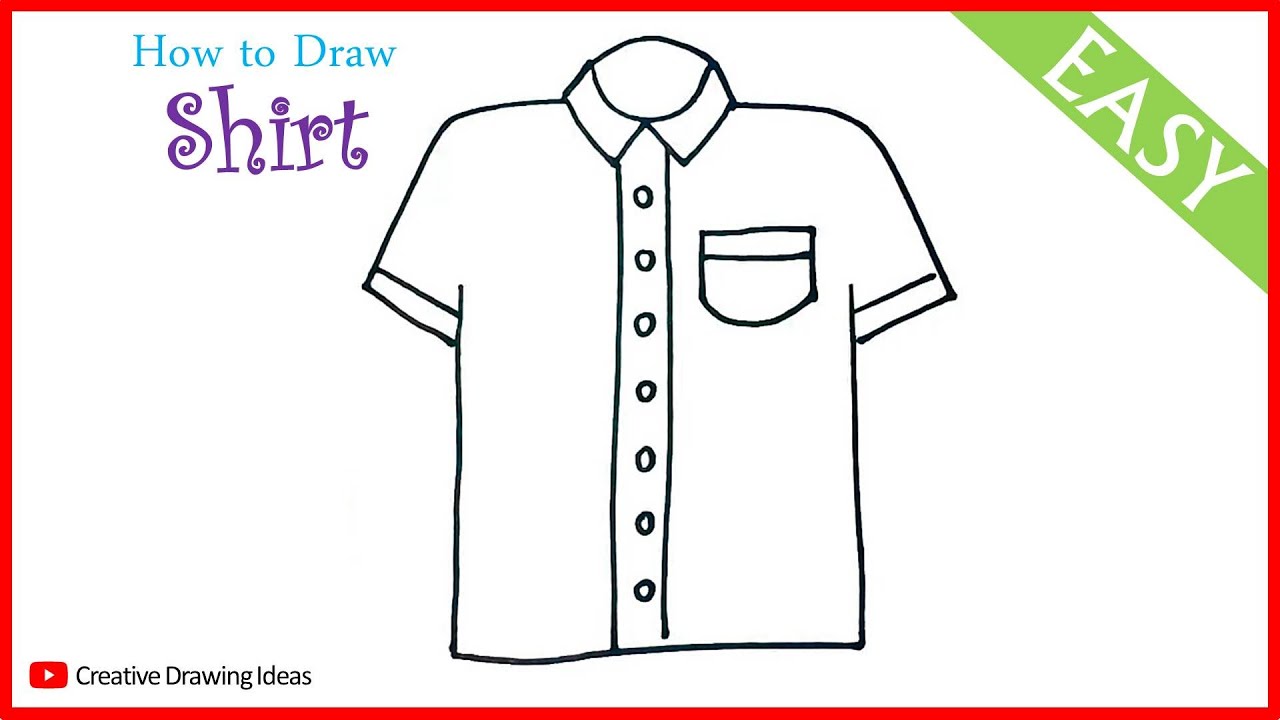
How To Draw A Shirt - The rectangle will determine the overall size and length. Add a series of creases and folds along the length of the sleeve. If you follow the steps and tips in this guide, you’ll be able to make super cool shirt drawings that show off how fancy and awesome clothes can be! With your sleeves in place, your shirt is really coming together. Draw it’s shape with a several smooth curves starting with the sides, next add the shoulders, neck and finally the bottom. Web drawing a shirt is super cool because it lets you add lots of style, texture, and fancy details to your artwork! This completes the outline of the collar. Web this line should follow the shape of the wrist, similar to the hem of the short sleeve. To get started we will use a sketching medium to sketch how our shirt will look. In your drawing space, sketch a large vertical rectangle. In this guide, we will explore the process of. Also make the overall shape slightly wider towards the top. In your drawing space, sketch a large vertical rectangle. Web drawing a shirt is super cool because it lets you add lots of style, texture, and fancy details to your artwork! Drawing shirts requires attention to detail and an understanding of. Add a series of creases and folds along the length of the sleeve. Connect the lines at the bottom using a short line. This part of the shirt is called the placket. In your drawing space, sketch a large vertical rectangle. Pay special attention to the elbow and wrist areas, where fabric naturally bunches up. Draw it’s shape with a several smooth curves starting with the sides, next add the shoulders, neck and finally the bottom. Extend long curved lines from each end of the line drawn in the previous step. If you follow the steps and tips in this guide, you’ll be able to make super cool shirt drawings that show off how fancy. Then, draw a pair of lines descending from the front of the collar. Drawing shirts requires attention to detail and an understanding of the structural elements that make up this essential piece of clothing. Draw it’s shape with a several smooth curves starting with the sides, next add the shoulders, neck and finally the bottom. Web drawing a shirt is. Draw it’s shape with a several smooth curves starting with the sides, next add the shoulders, neck and finally the bottom. Also make the overall shape slightly wider towards the top. In your drawing space, sketch a large vertical rectangle. Connect the open ends of one triangle to the open ends of the other triangle using curved lines. This completes. Follow my step by step drawing tutorial and make your own shirt drawing easy!👇 subsc. Draw it’s shape with a several smooth curves starting with the sides, next add the shoulders, neck and finally the bottom. Connect the open ends of one triangle to the open ends of the other triangle using curved lines. Pay special attention to the elbow. Connect the open ends of one triangle to the open ends of the other triangle using curved lines. In this guide, we will explore the process of. Follow my step by step drawing tutorial and make your own shirt drawing easy!👇 subsc. Then, draw a pair of lines descending from the front of the collar. Connect the lines at the. Connect the lines at the bottom using a short line. The rectangle will determine the overall size and length. This completes the outline of the collar. Drawing shirts requires attention to detail and an understanding of the structural elements that make up this essential piece of clothing. This part of the shirt is called the placket. Follow my step by step drawing tutorial and make your own shirt drawing easy!👇 subsc. Also make the overall shape slightly wider towards the top. Draw it’s shape with a several smooth curves starting with the sides, next add the shoulders, neck and finally the bottom. Also, draw a wide u shaped line just below the line drawn in the. Add a series of creases and folds along the length of the sleeve. Also, draw a wide u shaped line just below the line drawn in the previous step. Web this line should follow the shape of the wrist, similar to the hem of the short sleeve. Extend long curved lines from each end of the line drawn in the. Drawing shirts requires attention to detail and an understanding of the structural elements that make up this essential piece of clothing. Web this line should follow the shape of the wrist, similar to the hem of the short sleeve. This completes the outline of the collar. This part of the shirt is called the placket. In this guide, we will explore the process of. With your sleeves in place, your shirt is really coming together. Draw it’s shape with a several smooth curves starting with the sides, next add the shoulders, neck and finally the bottom. Pay special attention to the elbow and wrist areas, where fabric naturally bunches up. Then, draw a pair of lines descending from the front of the collar. If you follow the steps and tips in this guide, you’ll be able to make super cool shirt drawings that show off how fancy and awesome clothes can be! Add a series of creases and folds along the length of the sleeve. Web drawing a shirt is super cool because it lets you add lots of style, texture, and fancy details to your artwork! In your drawing space, sketch a large vertical rectangle. To get started we will use a sketching medium to sketch how our shirt will look. Connect the lines at the bottom using a short line. Connect the open ends of one triangle to the open ends of the other triangle using curved lines.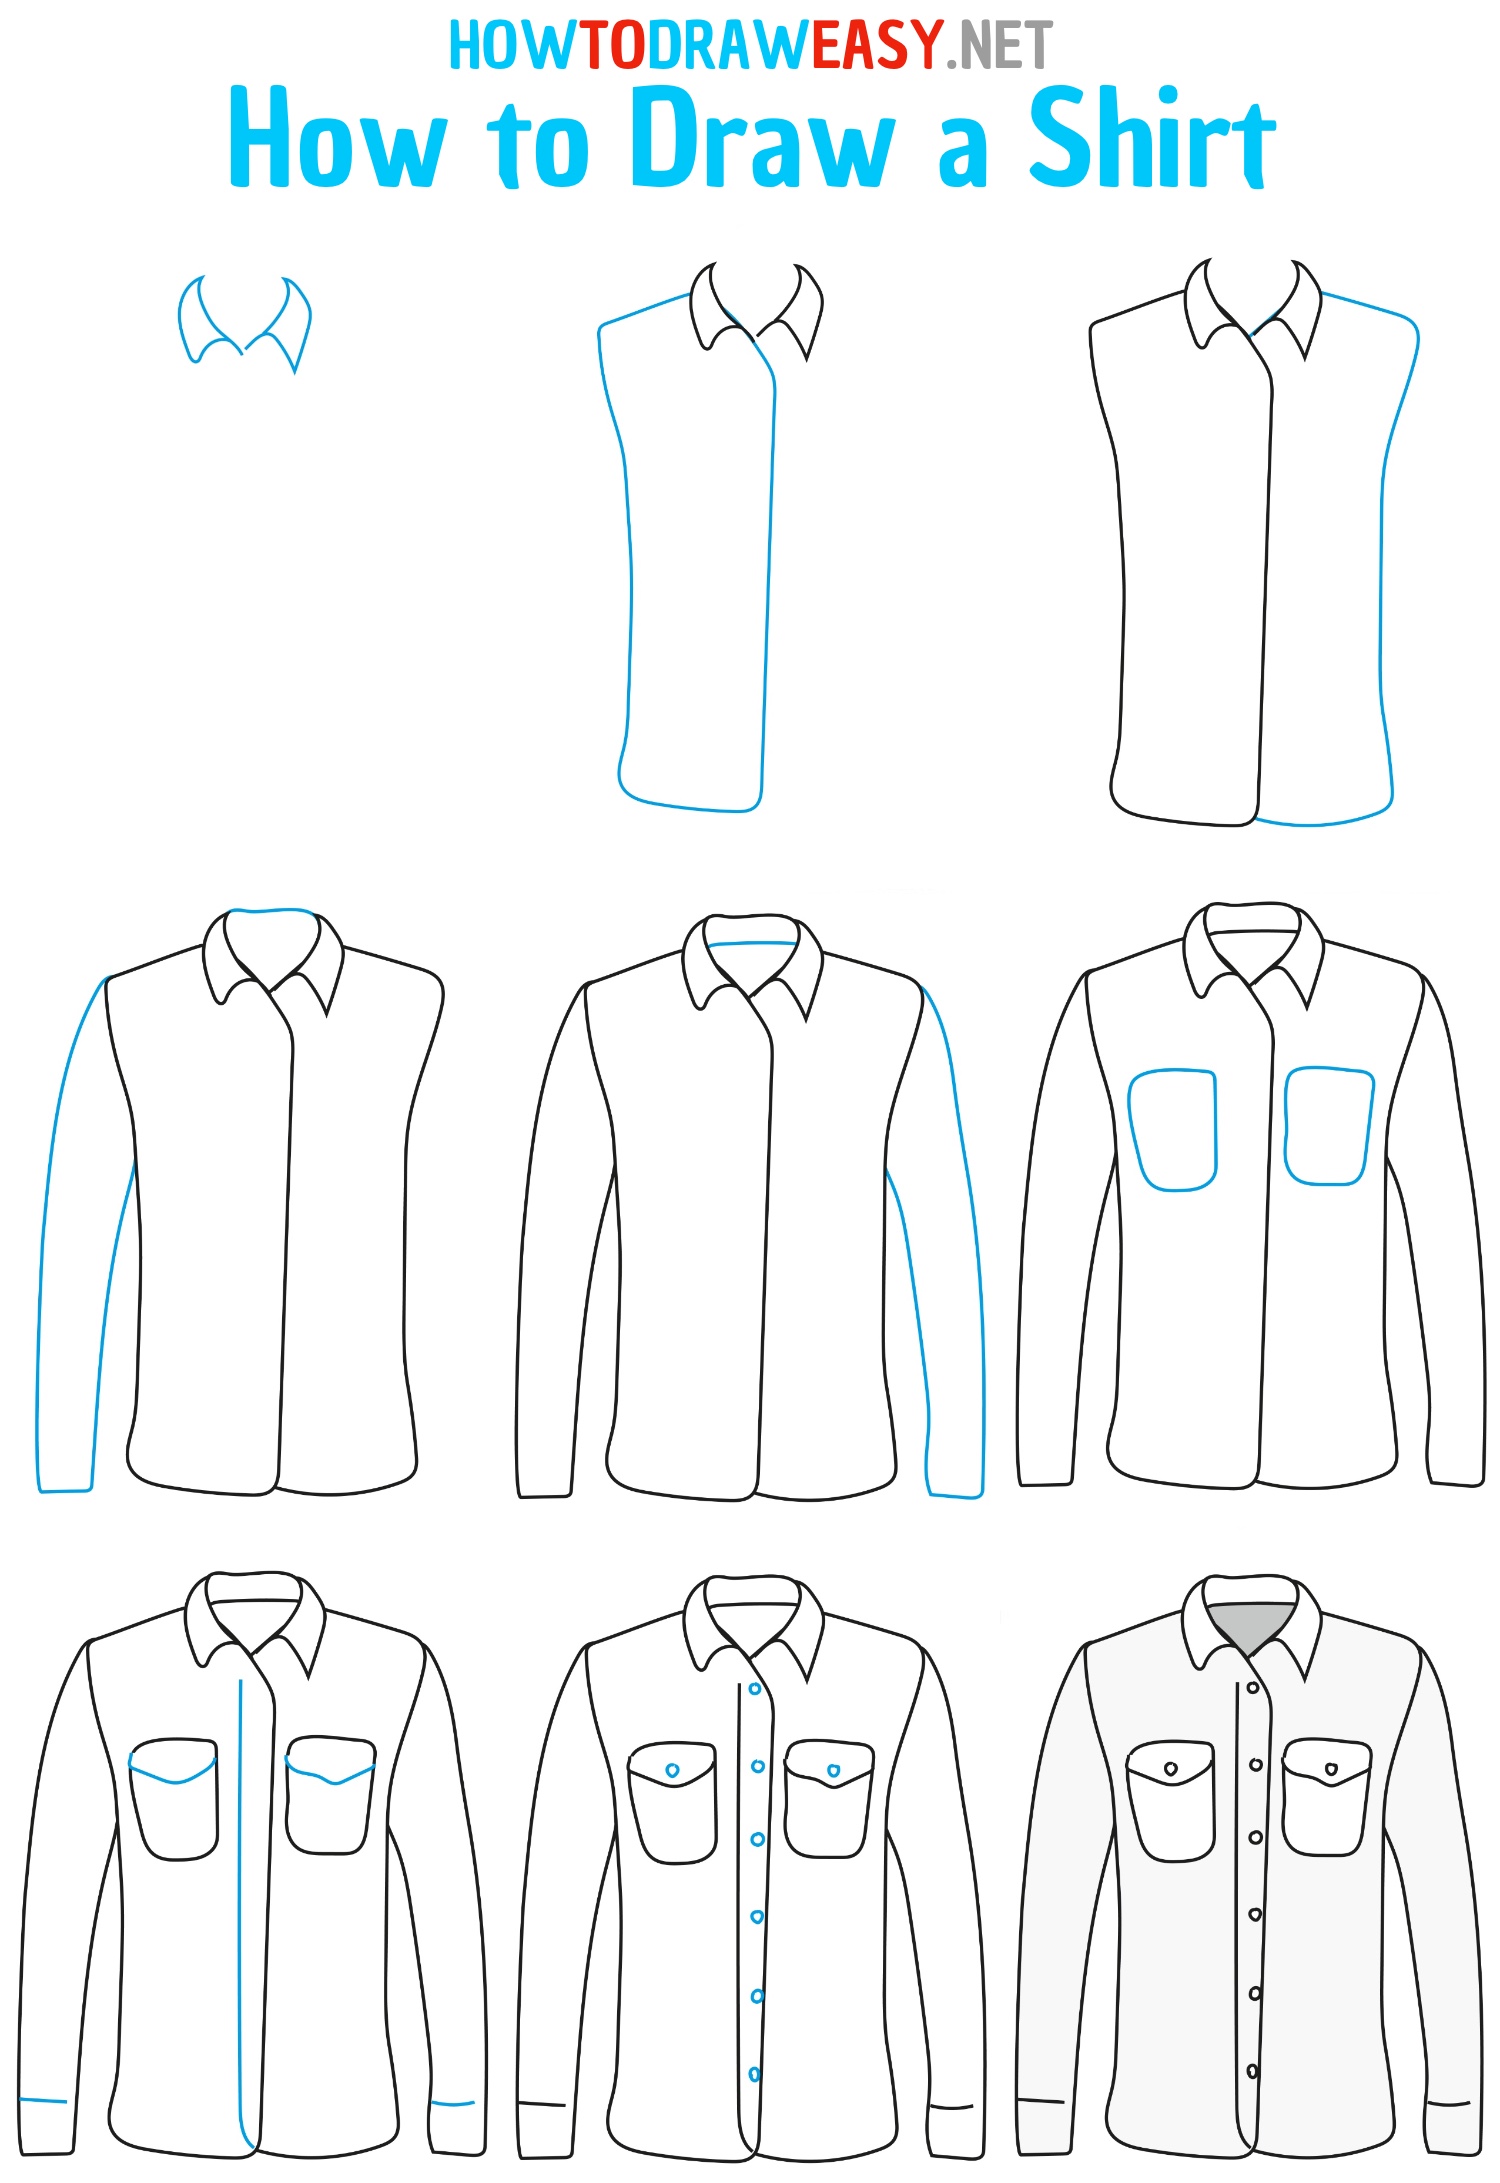
How to Draw a Shirt How to Draw Easy

How to Draw a Shirt How to Draw Easy
How to Draw a Tshirt Easy Drawing Tutorial For Kids
How to Draw a Shirt
Shirt Drawing How To Draw A Shirt Step By Step
Shirt Drawing How To Draw A Shirt Step By Step

how to draw a shirt easy step by step Brandie Corbitt

how to draw a shirt easy step by step Brandie Corbitt
Shirt Drawing How to Draw a Shirt Step by Step T Shirt Drawing Easy

How to Draw a Shirt Design School
Also, Draw A Wide U Shaped Line Just Below The Line Drawn In The Previous Step.
Web Hi Everyone, In This Video I Show You How To Draw A Shirt Step By Step.
Also Make The Overall Shape Slightly Wider Towards The Top.
Extend Long Curved Lines From Each End Of The Line Drawn In The Previous Step.
Related Post: